DEFAULT WALLPAPER SETTINGS
GPO - CONFIGURE THE WALLPAPER
🔻Create a shared folder and place a copy of the Wallpaper.
🔻This will be the distribution point of the wallpaper file to the network.

🔻In our example, a shared folder named WALLPAPER was created.
🔻All the domain users and all the domain computers were given read permission over this folder.

🔻In our example, this is the path to access the network share.
\\tech-dc01\WALLPAPER
🌐On the domain controller, open the group policy management tool.

🪩Create a new group policy.
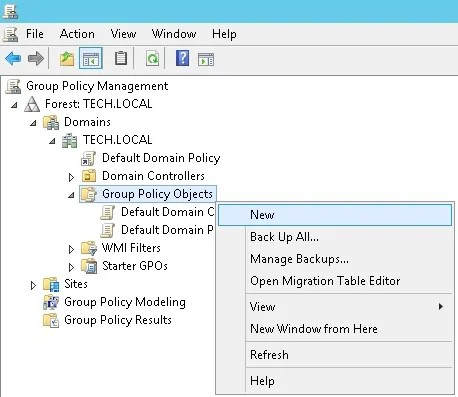
✳️Enter a name for the new group policy.

✳️On the Group Policy Management screen, expand the folder named Group Policy Objects.
⚜️Right-click your new Group Policy Object and select the Edit option.

🔶On the group policy editor screen, expand the
User configuration folder and locate the
following item.
User configuration folder and locate the
following item.
User Configuration > Preferences > Windows Settings > Files
🔶Right-click on the Files option and create a new Files

✳️ On the source field, enter the network path of the wallpaper.
💫 On the destination field, enter the local path to save a copy of the wallpaper.
💫 The source field, enter the network path of the wallpaper.
💫On the destination field, enter the local path to save a copy of the wallpaper.

✴️In our example, the GPO will create a local copy of the wallpaper file.
✴️Next, configure the GPO to automatically enable the local copy of the image file as the wallpaper.
✴️On the group policy editor screen, expand the User configuration folder and locate the following item.
User Configuration > Policies > Administrative Templates > Desktop > Desktop
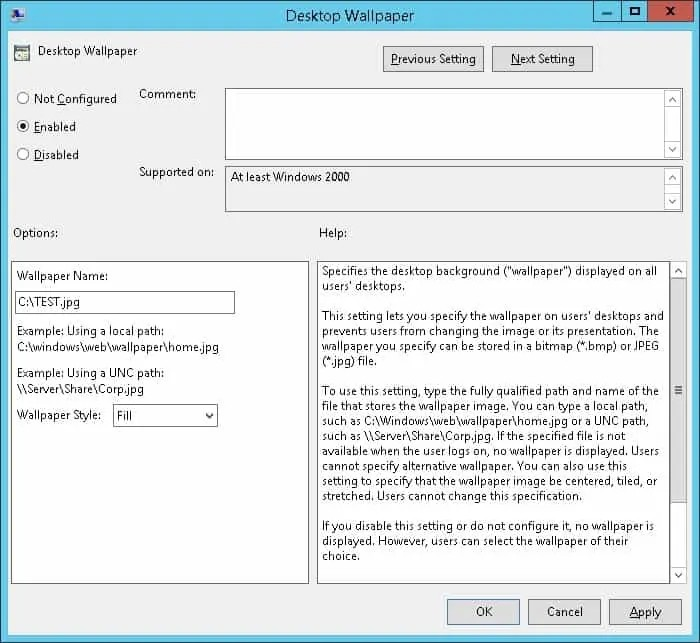
✨Access the folder named Desktop.

✨Enable the item named Desktop wallpaper.
✨Enter the path to the local copy of the wallpaper file.
✨To save the group policy configuration, you need to close the Group Policy editor.
✨Congratulations! You have finished the GPO creation.


Comments
Post a Comment